Assetic Python SDK - Quick Start
Introduction
The Assetic Python SDK is a python package for the Assetic REST API. It simplifies integration as it assists with request preparation and validation, executing the request and handling the response. It also includes modules that assist with complete integration processes by combining typical workflows into a single method.
Integrators familiar with Python can get started using the following quick start examples, otherwise start with the Python notes and links at the end of this article.
Obtaining the Assetic Python SDK package
Python pip
The SDK is registered in PyPI (Python Package Index) and is automatically downloaded and installed when using using the utility pip.
Pip can be run as an executable from a command window as per the example below (assumes pip.exe is in the current folder or set the in the PATH environment variable)
pip install assetic
Alternatively pip can be run from the python executable as per the example below where the 'pip' command is preceded by 'python -m'. This is particularly useful where there is more than one installation of python on the machine. In a command window change directories to the folder containing the python.exe of your target python install.
python -m pip install assetic
Alternatively pip can be run from the python executable
Pip may also be run from within Python
import pip pip.main(["install","--upgrade","assetic"])
Initial install of Assetic package
When installing the Assetic python package for the first time the pip parameters to use are "install assetic" as per the example below, remembering that pip may be run in a few different ways as described above.\
pip install assetic
Upgrading Assetic package
You can use the "--upgrade' flag to update the assetic module to the latest published version if you have an older version already installed. Setting the 'upgrade strategy' allows the Assetic package to be upgraded but dependent packages are not upgraded unless the existing version is older than what the Assetic package requires
pip install --upgrade --upgrade-strategy only-if-needed assetic
Other Assetic packages
Assetic also publish python packages for GIS integrations. These packages are also installed by pip. When installing these GIS packages the 'assetic' package is automatically installed becuase the GIS packages reference the 'assetic' package. The install options above apply the the GIS packages, simply replace 'assetic' with the GIS package name. For example the ESRI integration package is 'assetic_esri':
pip install assetic_esri
Troubleshooting
Proxy
Pip may be blocked by a proxy server from accessing the Assetic Python SDK. If you get an error message containing 'ProxyError' refer to the section below Pip - Proxy Server Authentication
Insufficient Access Rights
If the python is installed in a folder that requires administrator or a higher level of privileges you will receive an "Access is denied" error as shown below:

This is particularly common when python is installed within the "C:\program files" folder (or sub-folder)
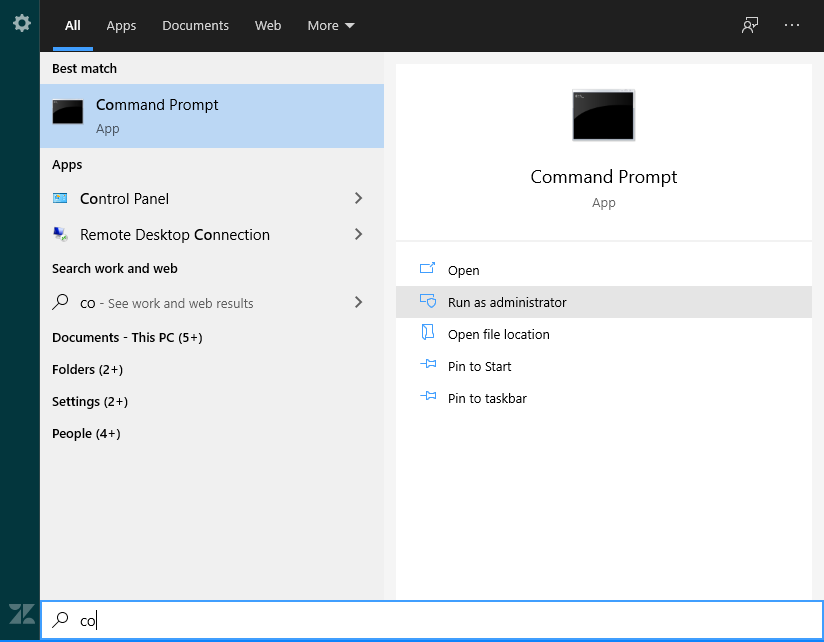
You may be able to overcome this by opening your command window in 'Administrator' mode:
If that fails to resolve the issue you can direct pip to install the packages into your 'user' folder (defined by the environment variable APPDATA) using the "-user" parameter.
pip install assetic --user
Assetic API Access Control
Assetic REST APIs require an API token for authentication. An API token (your_api_key in the examples below) should be generated for every User being utilised for API access. Instructions for obtaining the token are in the article Assetic REST API Introduction
The Assetic Python SDK supports the use of a configuration file to connect and authenticate to Assetic. This file is typically named "assetic.ini" and is saved in the roaming profile folder "%APPDATA%/Assetic".
Creating assetic.ini by Prompt
After installing the Assetic python SDK open a python prompt and run the following 2 lines:
- from assetic import ini_prompter
- ini_prompter()
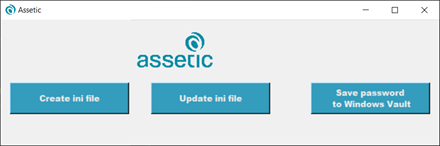
A window will appear with 3 options:
- Create ini file
- A new assetic.ini file will be created in the "%APPDATA%/Assetic" folder
- Update ini file
- This allows you to apply a password change or reset your API authentication token. The assetic.ini file must already exist in the "%APPDATA%/Assetic" folder
- Save password to Windows Vault
- When the assetic.ini file is created the Assetic token (password) will be saved in your Windows Vault rather than in the assetic.ini file. The assetic.ini file is still required as it defines your Assetic environment and user name.
Option 1: Create ini file
Fill the username with your Username from Assetic, Password with your password from Assetic and Url from your Assetic environment (including the https:// prefix).
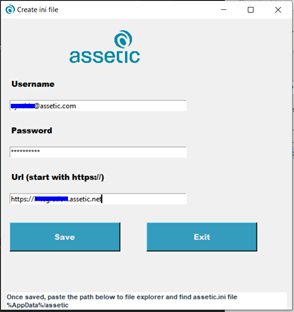
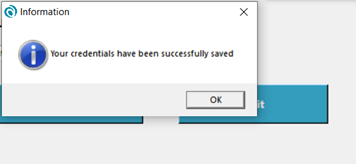
Once finished, click “Save”. If the credentials are correct, a new window saying “Your credentials have been successfully saved” will show in a pop-up. However, if an error is encountered, such as “Wrong password/username or wrong Url”, an error pop-up will display and you will need to correct it.

Once saved, you can close all prompter pop-up windows, and then exit the process.
Option 2: Update ini file
You will be able to enter your Assetic password only. Choosing 'Update' will then apply and save a new API token to an existing assetic.ini file stored in the %APPDATA%/Assetic folder.
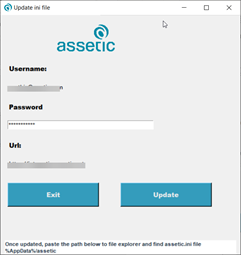
A new window that says “Your credentials have been successfully saved” will pop up. If you type the wrong password, an error message will display.
Option 3: Save password to Windows Vault (Credential Manager)
Populate the 'Username' and 'Password' fields with your Assetic Cloud credentials, and also provide the Url for your Assetic environment (including the https:// prefix).
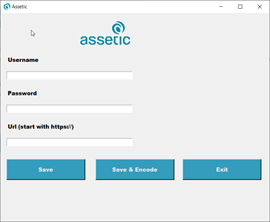
Once populated, you can choose to click "Save" or "Save & Encode":
Note: Both of the "Save" or "Save & Encode" options will also create a new assetic.ini file in the "%APPDATA%/Assetic" folder. The file will contain your username and Assetic Cloud URL and is used in order to fetch the stored API token.
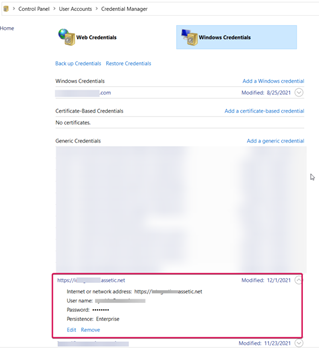
- "Save": will store your Assetic URL, Username and API Token in the Windows vault.
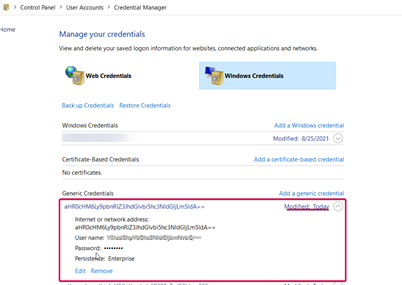
- "Save & Encode": will encode the Assetic URL, Username and API Token details prior to saving them in the Windows Vault.
Manual creation of assetic.ini file
Create and save a config file called "assetic.ini" to store all global variables. Replace the following placeholders in the config file with your information: your_assetic_login_name, your_api_key and your_org.
- [auth]
- api_key=your_api_key
- username=your_assetic_login_name
- [environment]
- url=https://your_org.assetic.net
- [proxy]
- server=your_proxy_server:port
- [smtpserver]
- host=smtp.your.smtpserver
- port=smtp_port
- [smtpauth]
- username=yoursmtp
- password=smtpuserpassword
If you find that the SDK is timing out with proxy server errors you will need to define the proxy server name and port number in the [proxy] section by setting the 'server' variable. The setting should separate the proxy name from the port number with ":". If you do not have a proxy server then the ini file does not require this section.
If you are planning to log errors to email the SMTP settings are required. The variables under [smtpserver] defines the SMTP server address and port number. The variables under [smtpauth] define the login credentials. If no login is required then this section is not required and may be omitted from the ini file. Likewise if not logging errors to email then omit the [smtpserver] section from the ini file. Logging to email must be initiated by your integration script, the existence of these settings is the first step. Refer to the following article email_logging for an example of implementing email logging.
Secure the file by only granting a non-privileged operating system account to have read/write access to the file. This same user account should then be used to run the scripts.
Alternatively the Assetic Python SDK can use the following environment variables instead of an ini file. This is useful for implementation on cloud servers such as AWS Lambda where the credentials can be encrypted and passed to the executing python script as environmental variables
| Variable Name | Description |
| ASSETICHOST | https://your_org.assetic.net |
| ASSETICUSER | your_assetic_login_name |
| ASSETICKEY | your_api_key |
| ASSETICCLIENTPROXY | optional. Proxy server name or IP address and port number |
Quick start - Get Version
This example gets the Assetic version using the Assetic Python SDK
import assetic
asseticsdk = assetic.AsseticSDK("c:/users/you/assetic.ini",None,"Error")
versionapi = assetic.VersionApi()
try:
	response = versionapi.version_get()
except assetic.rest.ApiException as e:
	asseticsdk.logger.error("Status {0}, Reason: {1}".format(e.status,e.reason))
else:
	print("{0}.{1}.{2}.{3}".format(response["Major"],response["Minor"],
		response["Build"],response["Revision"]))
How It Works
Firstly the assetic package is loaded
import assetic
The next step is to create an authenticated instance of the Assetic SDK. There are 3 optional parameters:
- The ini file (as described above in Assetic API Access Control), including full path to the file. The ini file identifies the Assetic environment the SDK will connect to, and the connection credentials. Alternatively use the keyword None if environment variables have been defined.
- The name of the log file. This file is appended to, not overwritten. If undefined (keyword None) then there is no log file created and logging is instead output the console.
- The third parameter is the logging level - one of 'debug','info' or 'warning','error','critical', or None (no logging). The logging levels are the standard Python logging levels.
asseticsdk = assetic.AsseticSDK("c:/users/you/assetic.ini",None,"Error")
In the example above the ini file is "c:/users/you/assetic.ini", there is no log file (so logging output will be to the console), and the logging level is "Error".
The next step is to create an instance of the Assetic API for "Version".
versionapi = assetic.VersionApi()
That instance is then used to run the API method version_get(). This method is executed within a try block to capture exceptions.
try:
	response = versionapi.version_get()
Handled exceptions with the Assetic REST SDK are raised as assetic.rest.ApiException. This exception type has the following key properties:
- Status: The status code, such as the HTTPS status response from the API e.g. "401"
- Reason: The reason for the status code, such as "Authorization has been denied for this request." which occurs when the login credentails are invalid or there is insufficient access permissions (code=401)
There response is JSON formatted. The version is broken down in major, minor, build and revision components, so in this example the version is printed as string in the format seen at the bottom of the Assetic application page
else:
	print("{0}.{1}.{2}.{3}".format(response["Major"],response["Minor"],
		response["Build"],response["Revision"]))
Next Steps
Using Assetic REST API Endpoints
Examples of how to use the Assetic Python SDK with the various Assetic REST API are available in the guide Assetic REST API Tutorial Python
Helper tool sets
The Assetic Python SDK currently has 3 'helper' tool sets that combine several of the base REST API endpoints to manage typical integration tasks. These tool sets provide the following functionality:
- Bulk Import: Wraps the data exchange process to enable automated bulk import and update of data in an Excel spreadsheet
- Sync Assetic data to local database: Wraps the 'Export All' functionality of 'Advanced Search' profiles to automate the export of the data in the search to a local SQL Server database
- Asset Tools Assetic Python SDK: Wraps the various Asset apis to simplify Python scripting.
Troubleshooting
Insecureplatformwarning / SNIMissingWarning
One known issue is for versions of Python earlier than 2.7.10. These versions may be installed by arcGIS versions 10.3 and earlier. If using the Assetic SDK in this environment you may get errors .
If the following errors are noticed when installing the Assetic package, or running the Assetic add-in, then there is an additional installation requirement to ‘secure’ python 2.7:
- SNIMissingWarning
- Insecureplatformwarning
To resolve this issue use pip to install the package pyOpenSSL using the command:
pip install pyopenssl
Pip - Proxy Server Authentication
A proxy server may impede pip when trying to download the Assetic Python SDK.
If you see an error message when running 'pip install assetic' check to see if the error message contains the words 'ProxyError'. If so first the get the name and port number of the proxy from your IT administrator.
When running pip you can then specify the proxy details as follows:
pip install --proxy=http://user:password@proxyserver:port assetic
where you replace:
user = your network login name (not Assetic login)
password = your network password
proxyserver = the proxy server name
port = proxy port number
You can also try it without using the username/password, since depending on the proxy configuration a password is not always required
pip install --proxy=http://proxyserver:port assetic
If still you still have a 'ProxyError' try using https instead of http.
Alternatively in the dos/shell prompt set the environment variables HTTP_PROXY and HTTPS_PROXY (substituting the values from above) and then the pip command:
- set HTTP_PROXY=domain\username:password@proxy:port
- set HTTPS_PROXY=domain\username:password@proxy:port
- pip install assetic
Alternate package install location
In some circumstances it may not be possible for pip to install the Assetic Python SDK and dependent packages due to insufficient permissions on the install folder. This is often the case where the Python install folder is in "c:\Program Files" and an Administrator login is required.
In this scenario the Assetic Python SDK and dependencies can be downloaded as a zip file and then extracted to a folder location the user has 'write' access to.
From a command prompt window execute the following command (in this example the destination file is "c:\Projects\Packages\assetic.zip"
pip install assetic -t c:\Projects\Packages\assetic.zip
The contents of the zipped file can be extracted to the desired folder location.
For python to become aware of the Assetic Python SDK, edit the environment variable "PYTHONPATH". This evironment variable needs to have the full path of the new folder location appended to the exisiting "PYTHONPATH" values. If the environment variable "PYTHONPATH" does not exist then it can be created with the new folder location as the value.
Python
You can use the Assetic REST API with Python to read, update, and create data in Assetic. Python is a powerful but beginner-friendly programming language with a clear and readable syntax. Visit the Python website to learn more about it.
All you need is a text editor and a command-line interface like the command prompt in Windows or the Terminal on the Mac. The Python install also includes an easy to use editor IDLE which may be used to update and validate python scripts.
The tutorials use version 3 of Python, however the Assetic Python SDK supports version 2.7 onward. To install the Python 3 on your system, see http://www.python.org/download/. If you have ArcGIS desktop installed you may already have Python 2.7 installed.
Finally, when copying the examples in this tutorial, make sure to indent lines exactly as shown. Indentation matters in Python.
If you're interested in learning Python for use in your projects, see the following resources:
- Dive into Python 3 by Mark Pilgrim
- Think Python by Allen B. Downey
